| BMW Concept Car Modeling | |||||||||||||||||||||||||||||||
This is a Making Of from the first sketch of my idea through the modeling process and the evolution of the car chassis's look and feel till the final Mesh. Light, material and rendering settings are not subject of interest. For further information in that case, look in my VW Concept Making Of - i used scene and materials almost the same way as in the VW Scene.
My
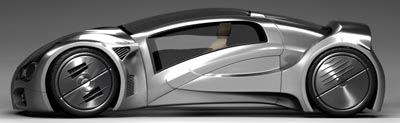
main idea was, to build a very agressive surreal looking futuristic
car - like every little boy wants to have
So, of course it doesn't have to be BMW, VW or
any other known manufactor - maybe you want to model an independent
concept car - the biggest problem in that case is the creativity
- or better i should say no creativity Now, when i was sure to make a BMW - i was thinking of the main body shape. I had two options in mind:
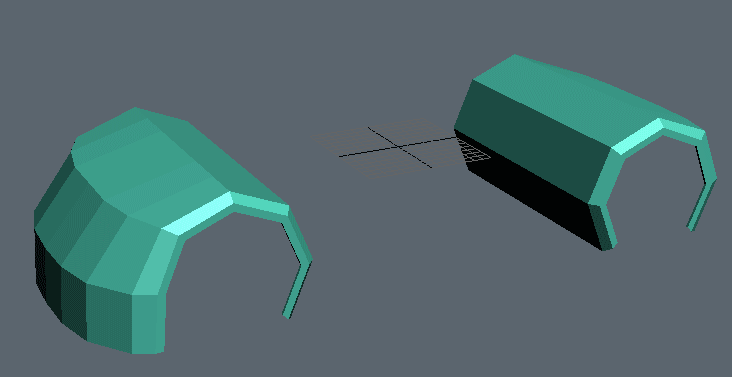
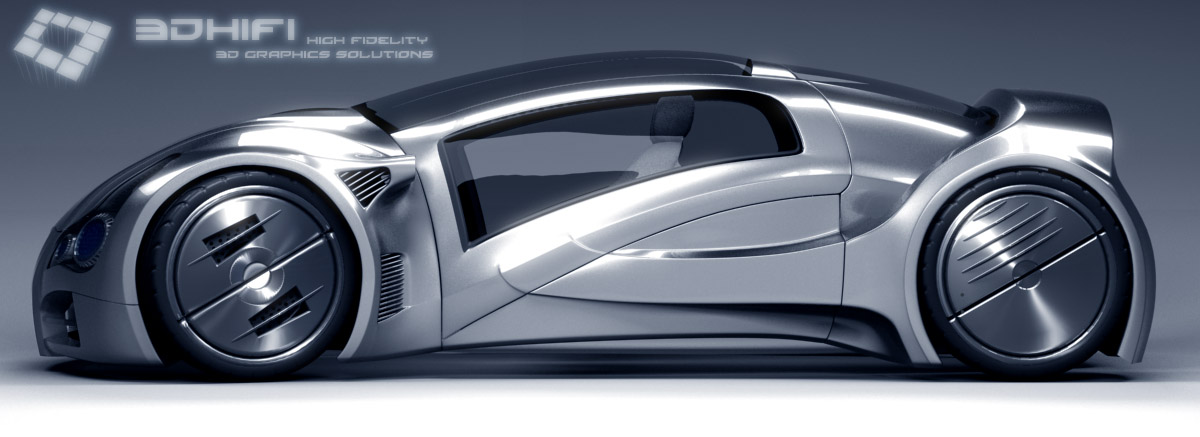
In this case i prefered the drop like design or a combination ob both - so i made some ugly sketches to see how the lines work together, not very detailed and not very impressive - only to get some ideas and form variations in mind. After this, the fun begins - the modeling process. I began with two cylinder objects, deleted some not usefull polygons and during the good old poly modeling process i fiddled around with some form variations. You can see an overview of the basic modeling process in this animated GIF:
As i thought the base chassis is finished, i got another idea for the sides - so i nearly rebuilt all the car body again. This trial and error process is not very productive but the result is going to get better with every moved vertex. If you are not a real designer thats the typical kind of finding your own concept.
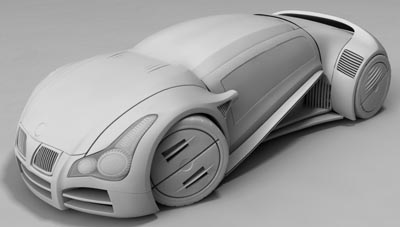
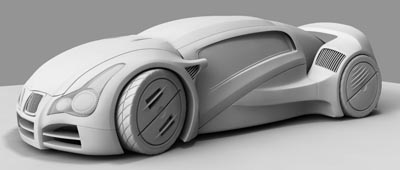
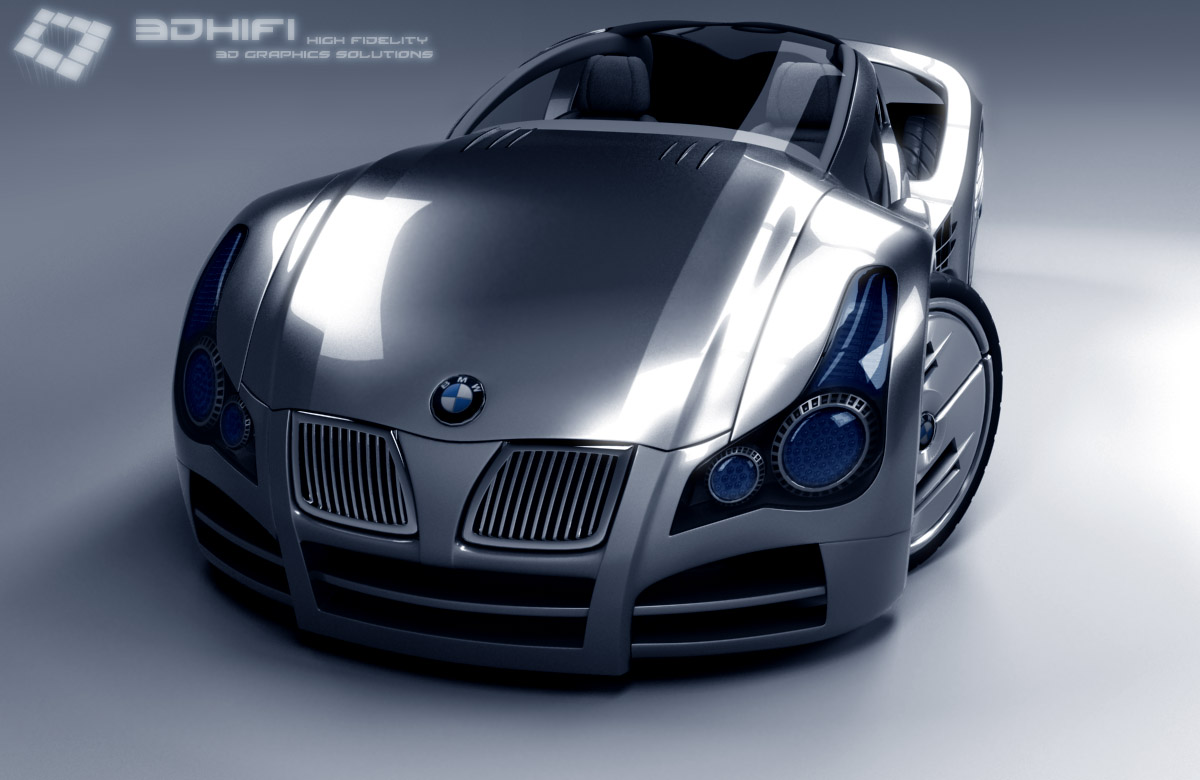
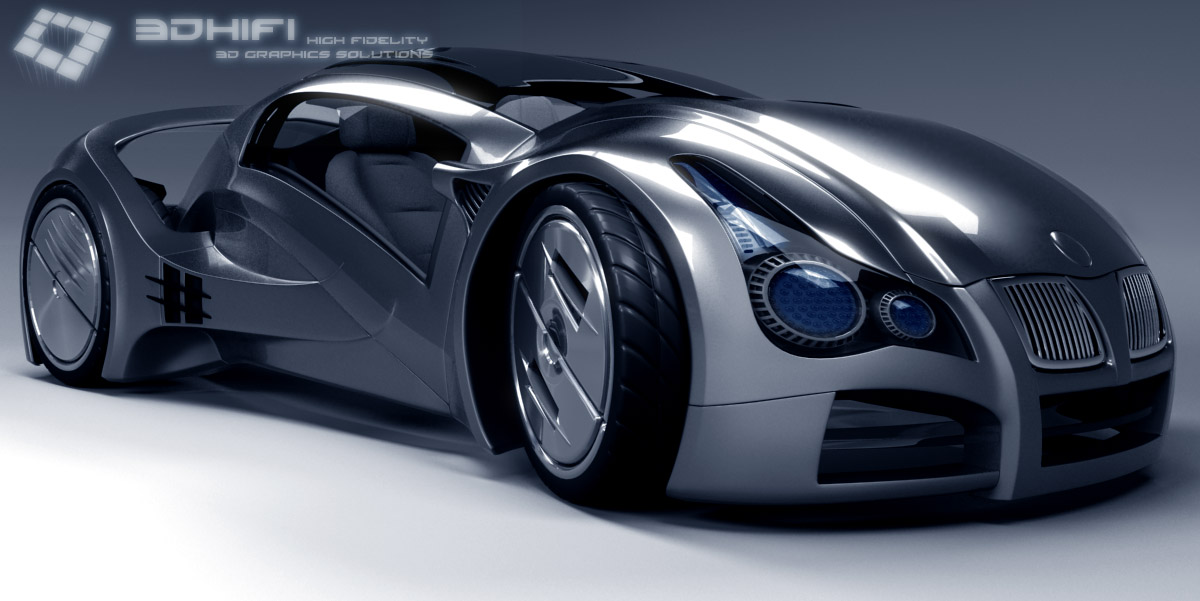
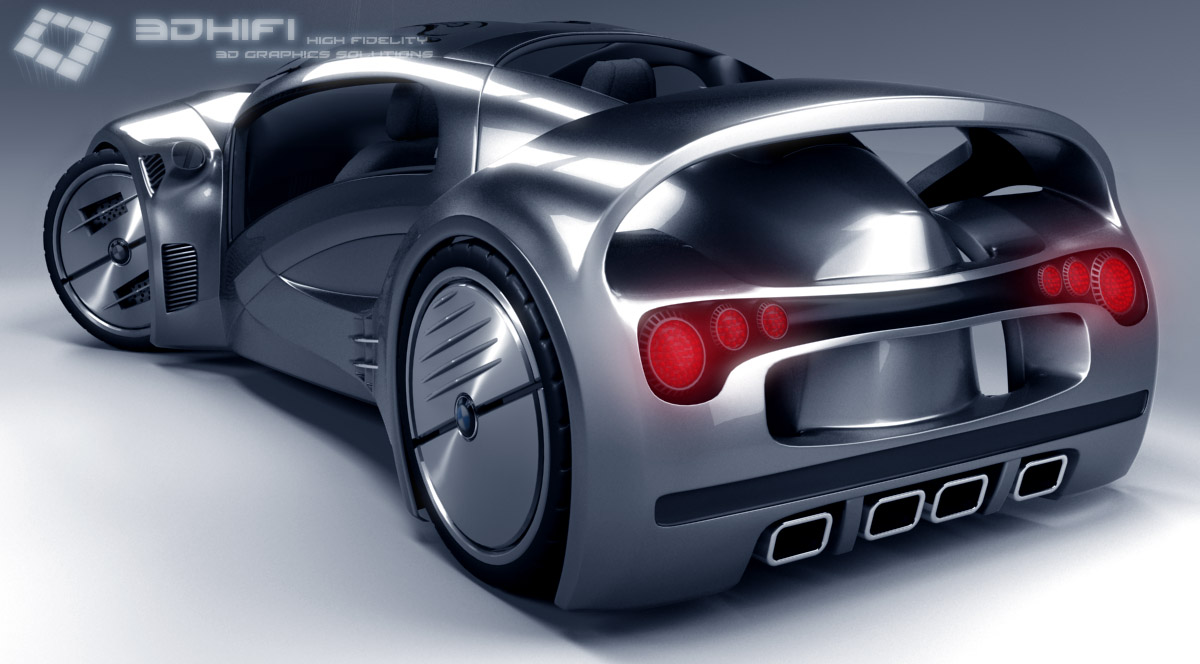
I had some details in mind, who would make my concept more individual to other concept studies, especially in this case. Because of the well known car manufactor i had to think of some very independent details to get a more united design - not only a collage of some nice existing cars ;) When i build the chasis it looked too much like an Audi TT or VW Beatle - so i had to brake the common line - that made me think of a spoiler. I tried to integrate it smooth in the existing line - and it worked. Another very unique design part are those totally integrated rear-view mirrors. With some BMW typical design elements - like those sharky gills in it - it works, and i cannot imagine this car with traditional rear-view mirrors.
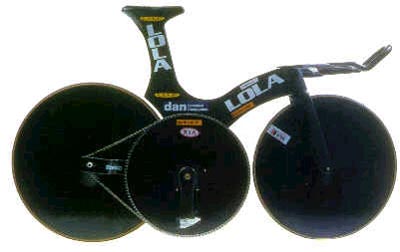
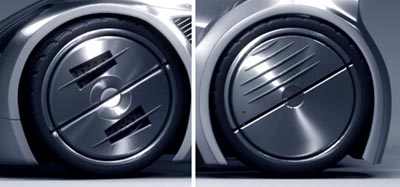
But one of the most characteristic things on this car must be the wheels - especially the rims.i thought about it for a long time. First i had some very rough rims with big angular spokes. This would look cool, of course - but would not be that cold futuristic look i wanted to create. So i got the opinion, that those speed bicycle wheels have instead of spokes one full filled wheel - because of the aerodynamic advantages of such constructions. And this gives a very futuristic look to those bikes - so i made a very similar version - with some holes for better airflow for the brake cooling system (never forget the practical part when creating your own designs).
I made the wheel material like brushed steel - to preserve the hard and cold all over look and feel.
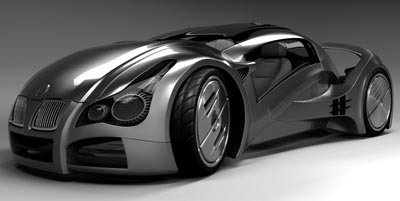
Every still-rendering needs some post work in Photoshop.
Common changes i make on every image are contrast and color corrections
- but there are some very interesting things that could help you
to save rendertime. Especially on modern still render images GI,
or similar light simulations, help to get the overall looking much
more plastic and even realer then a fake GI with many simple Point
Lights. But the process is very time consuming if you want to get
a smooth result - and nobody likes grain or GI blobs. So let's have a look at this:
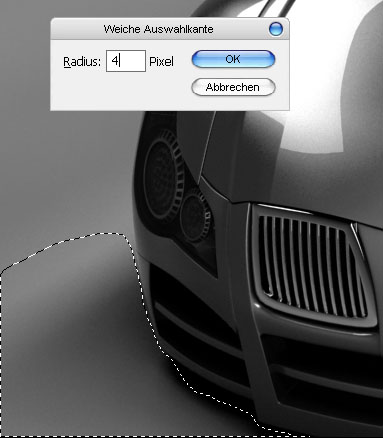
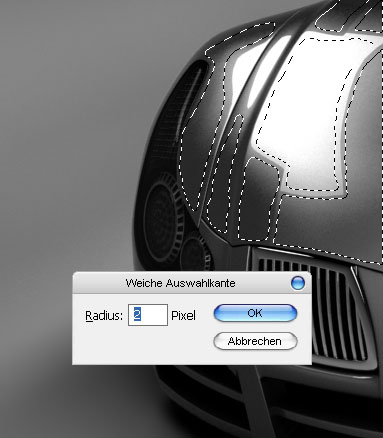
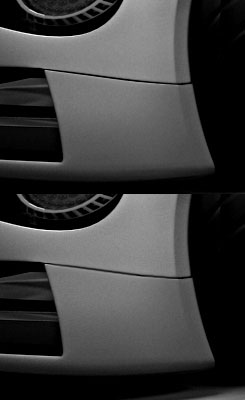
Another problem on many renderings are aliased
edges - with PS you can easily anti-alias them with this tool
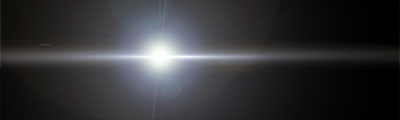
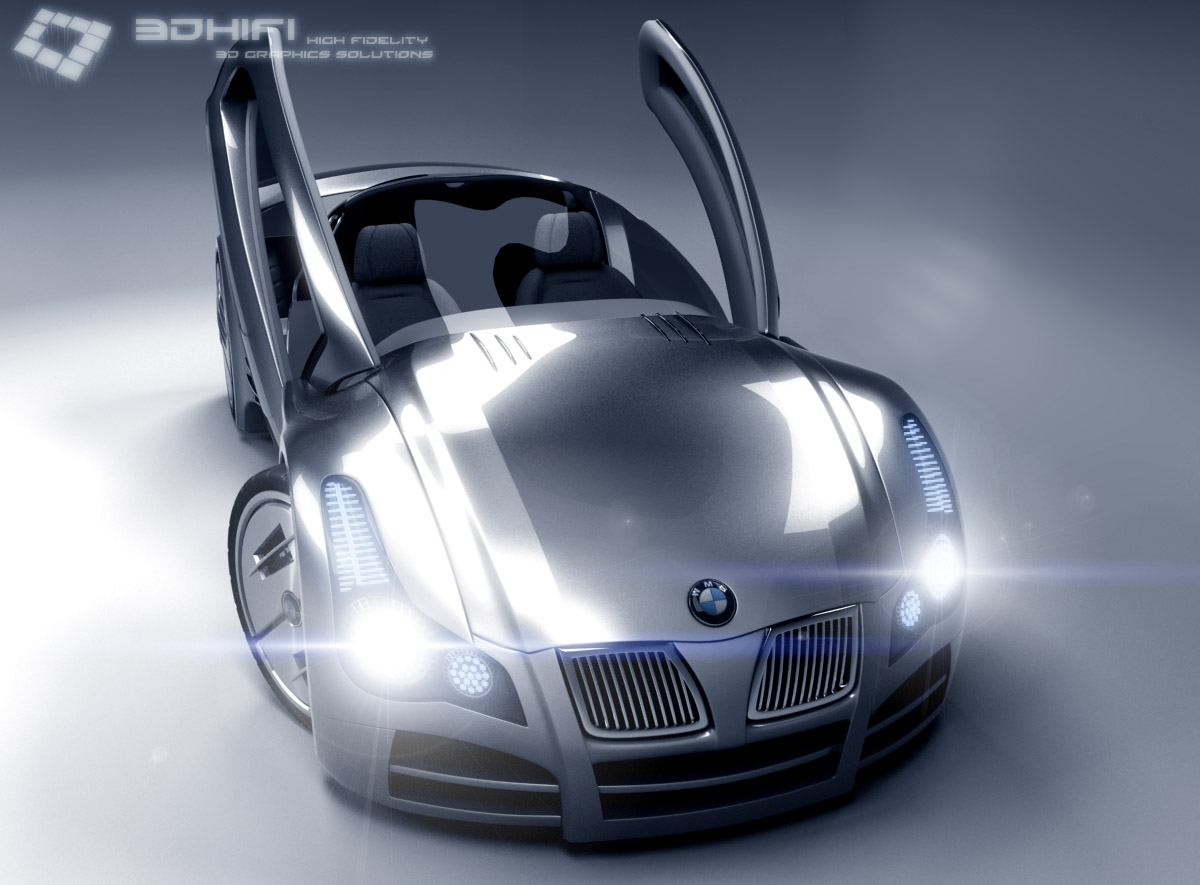
Last main thing that i added in PS was the overglow of the front/back lights and the lensflares. Of course i could add the lensflare effects in the renderer post effects - but for still images i like to have the manual control to play with some settings like itensity, size, color and so on. I am sure there are many ways to add lens effects with Photoshop - here is what i've done: First i added a new layer on top - filled with black color. Then i used Filter->Rendering-Filter->Lensflare->105mm size of 100% is almost ok, if necessary i lower the sice later. Now i set the composition effect for that layer to negativ multiply and change some brightness/contrast for finetuning. This horizontal streched flare is not more than it seems - a vertical shrinked and horizontal streched Photoshop 105mm flare.
I hope you enjoyed this little Making-Of and some of the techniques are usefull for your work.
|
|||||||||||||||||||||||||||||||
© by Benny Herudek 2004 |
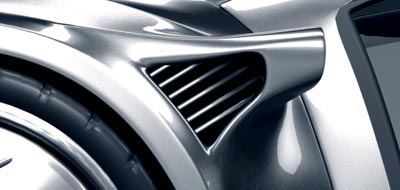
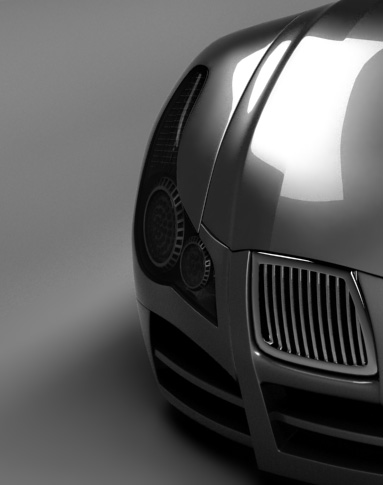
 . One thing, that could
help very much to give the whole project a realistic touch, is to
take your favourite car manufactur - like BMW in that case - and
look for the design line that you can find in all the current car
products. If you have an idea what BMW is - and what the modern
BMWs are looking like - you know the typical form of the front with
that cat-like lights, the bulge of the engine bonnet and of course
those renal formed air inlets or the BMW logo in the middle.
. One thing, that could
help very much to give the whole project a realistic touch, is to
take your favourite car manufactur - like BMW in that case - and
look for the design line that you can find in all the current car
products. If you have an idea what BMW is - and what the modern
BMWs are looking like - you know the typical form of the front with
that cat-like lights, the bulge of the engine bonnet and of course
those renal formed air inlets or the BMW logo in the middle.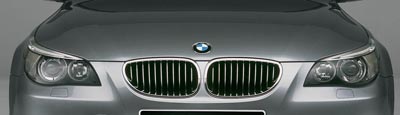


Awesome concept.... bravo work....
ur car model is what inspired me to take up CG as a career.
very well done ! the car is so interesting and very nice . I love it anyway ^^

Comments are not available for this entry.